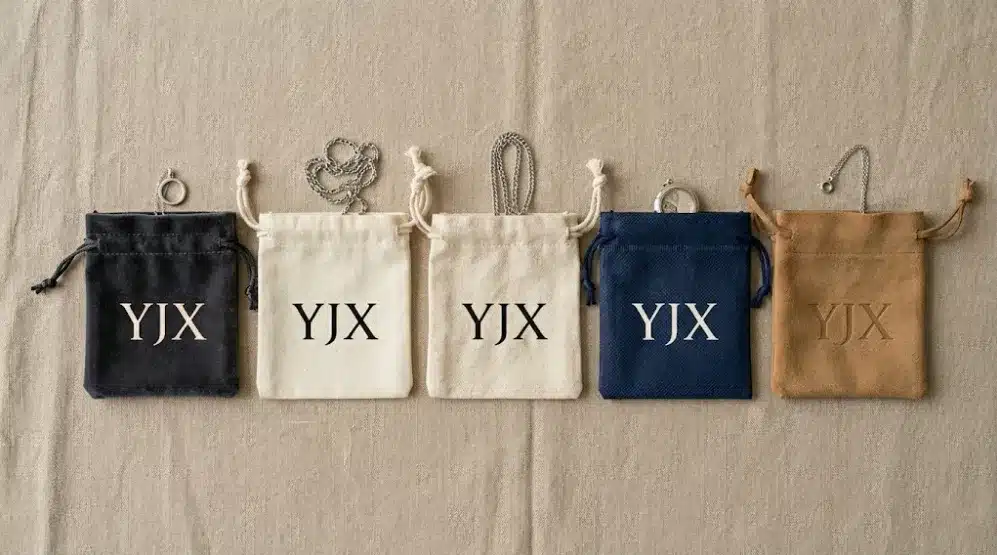
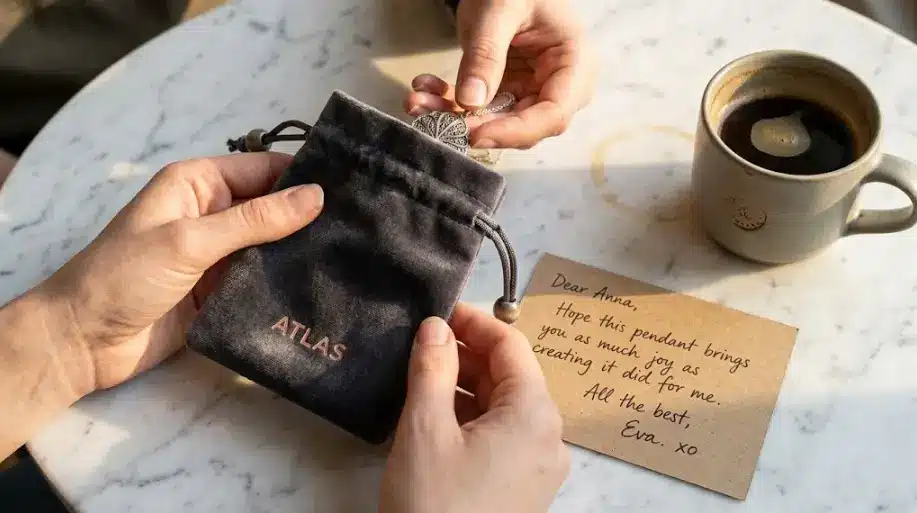
You just received your Mejuri necklace order. As you open the drawstring pouch, a small gold-foil logo catches the light. You snap a photo. Then you post it to Instagram Stories. In ten seconds, you’ve just given the brand free advertising — and you didn’t even notice.
In fact, this happens millions of times a day. The pouch is not just packaging. Instead, it’s a micro billboard your customer carries home. Plus, every time they reuse it, your logo shows up again. So a $0.60 pouch can deliver dozens of brand impressions over its lifetime.
But here’s the catch. Most brand owners pick a logo printing method on instinct. They send a PNG file, approve a sample fast, and hope for the best. Then the logo fades after three washes. Or the colors come out wrong on bulk. Or the cost doubles because they picked the wrong process for the material.
This guide fixes that. First, you’ll learn what each of the 5 main logo printing methods actually does. Second, you’ll match the right method to your material, budget, and brand look. Third, you’ll avoid the three most expensive mistakes brands make during sampling. By the end, you’ll be ready to send a clean logo file, ask the right questions, and approve a sample with confidence.
1. Why Logo Pouches Matter More Than You Think
Let’s start with the math. The average jewelry customer keeps their packaging pouch for about 18 months. They use it for storage, travel, or gifting. So one pouch generates roughly 40–60 brand impressions over its lifetime. Compare that to a single Instagram ad view, which costs $0.20–$1.50 each. Suddenly, that $0.60 pouch looks like a bargain.
Plus, the unboxing moment has become its own marketing channel. TikTok alone has over 100 billion views on the #unboxing hashtag. So if your cotton pouch looks generic, you’ve lost the moment. Meanwhile, a well-designed custom jewelry pouch with logo gets photographed, filmed, and shared — for free.
Then there’s brand recall. Every time your customer opens a drawer and sees your logo on the pouch, they remember the brand. So that pouch becomes a passive marketing asset that works while you sleep. As a result, a small logo upgrade can lift repeat purchase rates by single-digit percentages — which adds up fast for any growing brand.
In contrast, a “naked” pouch with no logo wastes all of this. You paid for the packaging anyway. So you might as well let it work for the brand. In short, logo customization is not decoration. Instead, it’s distribution.
2. The 5 Main Logo Printing Methods Explained
So which method should you actually pick? Here are the five most common options, each with a clear use case.
Method 1 — Hot Stamping (foil press). A metallic foil sheet is pressed onto the pouch under high heat and pressure. So you get a shiny gold, silver, or rose-gold logo with crisp edges. Plus, hot stamping survives years of use without fading. Best for: premium and bridal brands. Material fit: velvet, suede, smooth cotton, paper boxes.
Method 2 — Silk Screen Printing. Ink is pushed through a fine mesh screen onto the pouch. So the logo sits on top of the fabric with a slight raised texture. Plus, it’s one of the cheapest methods at scale. Best for: DTC and lifestyle brands. Material fit: cotton, canvas, non-woven, kraft paper.
Method 3 — Embroidery. The logo is stitched directly into the fabric with colored thread. So the result is tactile, textured, and very durable. Meanwhile, it gives a handcrafted, premium feel. Best for: artisan and bohemian brands. Material fit: cotton, canvas, linen, jute — avoid thin or delicate fabrics.
Method 4 — Heat Transfer (heat-press film). A printed film is heat-pressed onto the fabric. So you can reproduce multi-color, photo-quality logos with sharp detail. However, the print sits on the surface, so it can crack or peel over time. Best for: brands with complex, multi-color logos. Material fit: cotton, polyester, non-woven.
Method 5 — Debossing / Embossing. A heated metal die presses the logo into the material, creating an inkless impression — debossed (sunken) or embossed (raised). So the look is ultra-minimal and very high-end. Best for: minimalist and luxury brands. Material fit: suede, leather, thick paper, premium velvet.
Naturally, no single method is “best.” Instead, each one fits a specific brand vibe and material. So the next section will help you compare them side by side.
3. Visual Comparison — Which Method Fits Your Look?
Now that you know the basics, let’s compare them directly. The table below stacks all five methods across the dimensions that actually matter.
| Method | Cost | Durability | Visual Feel | Min Logo Size | Colors | Sample Time |
|---|---|---|---|---|---|---|
| Hot Stamping | Medium | ★★★★★ | Shiny, premium | 8mm | 1 (foil color) | 1–2 days |
| Silk Screen | Low | ★★★★ | Flat, vibrant | 5mm | 1–4 per screen | 1–2 days |
| Embroidery | Medium–High | ★★★★★ | Textured, crafted | 12mm | Up to 8 | 2–3 days |
| Heat Transfer | Medium | ★★★ | Full-color, sharp | 6mm | Unlimited | 1–2 days |
| Debossing | Medium | ★★★★★ | Inkless, subtle | 10mm | 0 (no ink) | 2–3 days |
So how do you read this table? Start with your brand vibe. For example, if you’re going for “quiet luxury,” debossing wins. Meanwhile, if you want a printed jewelry pouch that pops in social photos, hot stamping or silk screen with bold colors works best. For artisan brands, embroidery’s textured feel is hard to beat.
Plus, here’s a quick shortcut. Picture the brands you admire. Tiffany? Hot stamping. Aesop? Debossing. Madewell? Silk screen. Catbird? Embroidery. So once you spot the pattern, your own choice becomes much clearer.
4. Cost Breakdown — What You’ll Actually Pay
Now to the part most guides skip — real numbers. The table below uses the same baseline: a 5×7 inch cotton pouch, MOQ 1,000, one-color logo about 30mm wide.
| Method | Logo Cost per Bag | One-Time Setup | Extra Color Cost |
|---|---|---|---|
| Silk Screen | $0.05 – $0.10 | $30 – $50 per screen | +$0.05 per color |
| Hot Stamping | $0.08 – $0.15 | $40 – $80 per die | Not applicable |
| Heat Transfer | $0.10 – $0.20 | $50 – $100 for film plate | Included |
| Debossing | $0.10 – $0.18 | $60 – $120 per die | Not applicable |
| Embroidery | $0.20 – $0.40 | $30 – $60 for digitizing | +$0.03 per color |
A few things stand out. First, silk screen is by far the cheapest per bag — but each color needs a separate screen. So a four-color logo can stack up fast. Second, embroidery costs the most per bag, but the setup fee is low. So it actually wins for smaller runs.
Plus, there are hidden costs to plan for. Sample fees usually run $20–$50, often refunded against bulk orders. Rush production adds 15–25% on average. And artwork revision fees apply if you change the logo file after the die is made.
Still, the math is friendly. For a $80 retail necklace, even the most expensive logo option (embroidery at $0.40) is less than 0.5% of revenue. Yet that logo drives reuse, social shares, and repeat purchases. So the ROI is rarely the bottleneck.
5. MOQ Reality — Can Small Brands Get Logo Pouches?
This is the question we hear most from emerging brands. The short answer: yes, but you need to know how MOQ works.
There are actually three MOQs hidden in any quote. First, the factory MOQ — the minimum total order. Second, the method MOQ — some processes need a minimum to be cost-effective. Third, the die or screen amortization — a one-time tool cost that hurts more on small runs.
At most factories, MOQs start at 500–1,000 pieces. At YJXpack, however, MOQ starts at 100 pieces for almost any process. So small brands can launch with proper branded jewelry packaging without committing thousands of dollars upfront. As a result, you can test market response before scaling.
So which method works best at low MOQ? Silk screen with a single color is the most cost-efficient at MOQ 100. Plus, hot stamping in one foil color is also feasible. On the other hand, multi-color heat transfer or 4-color embroidery makes more sense once you’re above MOQ 500 — that’s when setup costs spread thin enough.
Still, MOQ 100 is rare in the industry. Most factories don’t want the production headache. So if you’re starting small, ask suppliers about their true minimum before designing your logo around constraints that may not exist.
6. How to Design a Logo That Prints Well
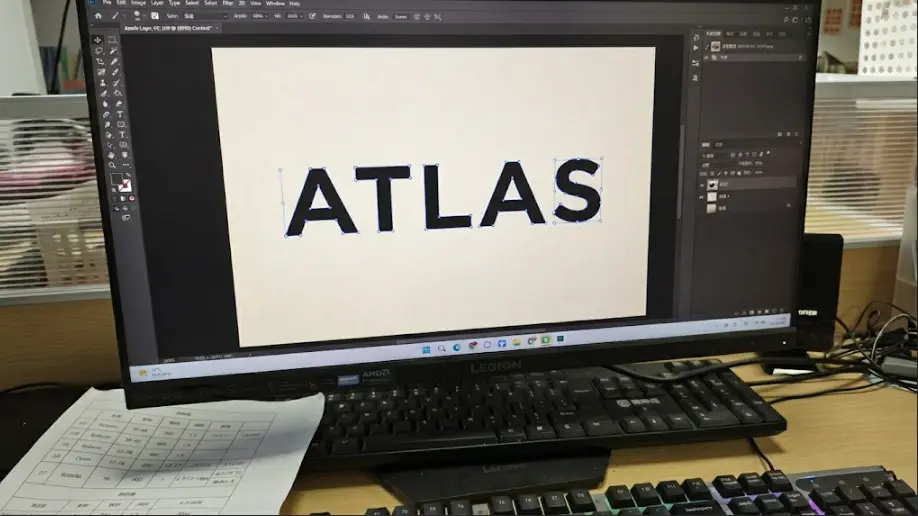
Even the best printing method can’t fix a bad logo file. So here are the seven design rules that save brands the most pain.
Rule 1 — Send vector files only. Use AI, EPS, or high-resolution PDF. Never send PNG or JPG for logo printing — they pixelate at production size. If you only have a raster file, ask your designer to redraw it in Adobe Illustrator first.
Rule 2 — Mind the minimum line weight. Lines below 0.5mm tend to break or blur on fabric. So bump up thin strokes before sending.
Rule 3 — Keep text legible. Below 8pt, most letters lose definition — especially with serifs. Plus, on rough fabrics like jute, the floor rises to 10pt.
Rule 4 — Use Pantone colors. CMYK and RGB shift between batches. Pantone numbers, on the other hand, lock the color. So always specify a Pantone color number for each logo color.
Rule 5 — Simplify complex logos. Tiny details disappear at small sizes. So if your logo has hairline serifs, gradient shadows, or 6+ colors, build a “packaging version” — a simplified mark for small applications.
Rule 6 — Add 5mm safe zone. Keep at least 5mm of clear space around the logo. Otherwise, the print may hit the seam or drawstring loop.
Rule 7 — Test contrast. Light logos on light fabric disappear. Plus, dark on dark wastes the print. So always check contrast: cream pouch needs dark logo, navy pouch needs metallic or white.
In short, design with the printing method in mind. Otherwise, even a perfect logo file can fail at production.
7. Matching Logo Method to Your Pouch Material
Material and method must work together. Pick the wrong combination, and the logo fades, cracks, or never looks right. The table below shows what actually works.
| Material | Best Method | Also Works | Avoid |
|---|---|---|---|
| Cotton / Canvas | Silk Screen | Embroidery, Heat Transfer | Debossing |
| Velvet / Flannel | Hot Stamping | Embroidery | Silk Screen, Heat Transfer |
| Suede / Microfiber | Debossing | Hot Stamping | Silk Screen |
| Kraft Paper | Hot Stamping | Silk Screen, Debossing | Embroidery |
| Non-Woven | Heat Transfer | Silk Screen | Embroidery, Debossing |
Why do some matches fail? For example, silk screen on velvet sinks into the pile and looks fuzzy. Likewise, embroidery on non-woven fabric tears the material. So material first, method second — always.
Also worth noting: eco materials add constraints. Recycled cotton holds silk screen well but can struggle with hot stamping foil adhesion. So if you’re working with eco-friendly jewelry packaging, ask for a foil-compatibility sample before committing.
In short, the right combination protects your logo for years. Meanwhile, the wrong one ruins it within weeks of customer use.
8. 3 Brand Case Studies — How Real Jewelry Brands Do It
Theory is helpful. Real examples are better. Here are three patterns we see repeatedly in the brands we manufacture for.
Case 1 — Minimalist Luxury Brand ($150–$400 jewelry). They picked a deep-charcoal velvet pouch with logo in rose-gold hot stamping. The logo is a single wordmark, 25mm wide, centered on the bag’s lower third. So the pouch reads “expensive” the moment customers see it. Plus, the rose-gold catches light beautifully in unboxing videos. Result: customers post 3x more unboxing content than their previous plain pouch.
Case 2 — Bohemian Handcrafted Brand ($40–$120 jewelry). They use a natural unbleached cotton drawstring pouch with multi-color embroidery — a small floral mark in earth tones. So the texture matches their handmade story. Meanwhile, customers often keep the pouch as a small accessory bag. Result: the pouch itself appears in customer photos as a styling prop, not just packaging.
Case 3 — Vibrant DTC Brand ($30–$80 jewelry). They went bold — bright lavender cotton pouch with a chunky white silk-screen logo. So the pouch is loud, fun, and recognizable from across the room. Plus, the silk screen kept their per-unit cost under $0.65 — perfect for their margin structure. Result: their pouch became part of the brand identity and now appears in their Instagram grid as a styling element.
In each case, the brand didn’t just slap a logo on a bag. Instead, they matched the method, material, and visual language to their customer’s expectations. So the pouch reinforces the brand on every reuse.
9. The 3 Most Expensive Mistakes in Logo Sampling
Even smart brands stumble during sampling. Here are the three mistakes that cost the most — and how to dodge them.
Mistake 1 — Sending raster files (PNG / JPG). The factory will print exactly what you send. So if the file is low-resolution, the printed logo shows jagged edges. The fix: always send AI or EPS vector files. If you only have a JPG, get it redrawn before you sample. Otherwise, you’ll redo the die.
Mistake 2 — Skipping Pantone color confirmation. “Red” means a hundred different things. So if you don’t specify a Pantone number, the factory picks one — and your bulk order may come back fire-engine red when you expected burgundy. The fix: send Pantone codes for every color in the logo. Plus, ask for a physical color swatch before approving bulk.
Mistake 3 — Approving sample without confirming bulk variance. A perfect sample doesn’t guarantee perfect bulk. Color batch shifts, fabric variations, and minor placement drift all happen at scale. The fix: ask the factory for the acceptable variance range in writing. Plus, request photos of the first 50 pieces off the bulk line before they finish the run.
In short, every one of these mistakes is preventable. So treat sampling as a contract negotiation, not a formality. The 30 minutes you spend confirming files, colors, and tolerances saves weeks of rework later.
10. How YJXpack’s Custom Logo Process Works
To put it in context, here’s how we run logo customization at YJXpack so brands can move fast without rookie mistakes.
The process is simple. First, you upload your logo file. Within 30 minutes, we send back a free 3D digital mockup showing how the logo will look on your chosen pouch. Plus, we flag any file or design issues right then — before a die is made. Then we produce a physical sample in 1–3 days. After your approval, bulk production runs in 5–7 days.
Importantly, MOQ starts at 100 pieces across all five logo methods. So new brands can launch full custom cotton jewelry pouch programs without major upfront commitment. Meanwhile, we hold GOTS, GRS, OEKO-TEX, BSCI, ISO 9001, and SABER certifications — so the materials and processes hold up to any retailer audit.
Above all, every step is transparent. We share Pantone match photos, bulk variance tolerances, and certificate numbers before you commit a dollar. To start, visit YJXpack or send your logo directly to our team.
11. Conclusion — From Logo File to Brand Statement
Let’s recap. A logo on a jewelry pouch is not decoration. Instead, it’s a passive marketing channel that works every time your customer touches the bag.
So how do you get it right? First, match the printing method to your material — never the other way around. Second, design for the printing method, not against it: vector files, Pantone codes, simple shapes at small sizes. Third, sample before bulk — always. Approve the physical sample, lock the variance tolerance, and request first-50 photos off the line.
Do all three, and your logo pouch stops being packaging. Instead, it becomes one of the highest-ROI brand assets in your entire customer journey.
12. FAQs
Q1: What’s the cheapest logo printing method for jewelry pouches?
Silk screen is the cheapest per bag, usually $0.05–$0.10 for a single color. Plus, the setup cost is low — about $30–$50 per screen. However, each extra color adds another screen fee. So silk screen is most cost-effective for 1–2 color logos on cotton or canvas pouches.
Q2: How long does a custom logo pouch take from design to delivery?
At YJXpack, the full timeline is about 10–14 days. First, the 3D mockup takes 30 minutes. Then sampling runs 1–3 days. After your approval, bulk production takes 5–7 days. Plus, sea shipping adds 25–35 days, while air freight adds 5–8 days. So plan accordingly.
Q3: Can I do logo printing at low MOQ?
Yes. YJXpack starts at MOQ 100 across all five logo methods. However, the per-unit cost is higher at this volume because setup fees spread over fewer pieces. So if you can scale to MOQ 500 or 1,000, the per-bag economics improve significantly.
Q4: Hot stamping vs silk screen — which lasts longer?
Hot stamping generally lasts longer on smooth fabrics like velvet and suede because the foil bonds into the surface. Silk screen ink, on the other hand, sits on top of the fabric. So silk screen can fade after many washes. Still, on cotton, a properly cured silk screen print easily lasts 3–5 years of normal use.
Q5: What file format do I need for logo printing?
Always send vector files: AI (Adobe Illustrator), EPS, or high-resolution PDF. Plus, include Pantone color codes for every color in the logo. Never send PNG or JPG for printing — these pixelate at production size and force the factory to redraw your logo, which may introduce errors.
Q6: Can I print multiple colors on one pouch?
Yes, but the method matters. Silk screen handles up to 4 colors, with each color adding a screen fee. Heat transfer supports unlimited colors at no extra cost. Meanwhile, embroidery supports up to 8 thread colors. However, hot stamping and debossing are single-color methods by nature.
Q7: Do you charge for samples?
YJXpack offers a free 3D digital mockup within 30 minutes — no charge. For physical samples, there’s a small fee of $20–$50 depending on the method, which is fully refunded against your bulk order. Plus, free pouch samples (without logo) are available to qualified brands.
Upload Your Logo — Get a Free 3D Mockup in 30 Minutes
YJXpack — Yijiaxin (Shenzhen) Packaging Co., Ltd.
For 20+ years, we’ve made custom jewelry pouches with logo printing — hot stamping, silk screen, embroidery, heat transfer, debossing — for brand owners, traders, and e-commerce sellers across the US, Europe, and the Middle East. We hold GOTS, GRS, OEKO-TEX, BSCI, ISO 9001, and SABER certifications, and we serve over 8,000 brands worldwide.
Send your logo today. Within 30 minutes, you’ll receive a free 3D digital mockup showing exactly how your logo will look on your chosen pouch — no cost, no commitment. Plus, we’ll flag any design or file issues before sampling.
Email: info@yjxpack.com
WhatsApp / WeChat: +86 18617112946
Website: www.yjxpack.com
Free 3D mockup in 30 minutes · Free pouch sample to your door · Quote within 3 minutes · MOQ 100 pieces · GOTS / GRS / OEKO-TEX / BSCI / ISO 9001 certified
Share This Story, Choose Your Platform!