A garment bag with a logo serves two jobs at once: it can provide a handling layer for a suit, dress or coat during transit and storage, and it communicates a brand every time the bag is seen hanging in a wardrobe, backstage or on a delivery rail. The tension between those two jobs is where most specification mistakes happen. A large logo that looks striking in a flat mockup may show visible change after repeated hanging, folding or handling. Fine brand text that reads clearly on screen may lose clarity on a textured fabric. A bold colour match that photographs well on a swatch card may look different once it covers a full garment-bag panel.
This guide walks through the variables that shape those outcomes: logo placement relative to the bag’s hanging orientation, material behaviour under repeated folding and hanger stress, branding method limits for large artwork and small details, colour and line-weight preparation, and the sampling and quality-control steps that catch problems before production.
> Scope note: This guide explains selection logic and artwork variables. Material availability, construction options, artwork method limits, MOQ, sampling, pricing and documentation should be confirmed against your final brief during quotation.
—
Logo Placement and Visibility on Garment Bags
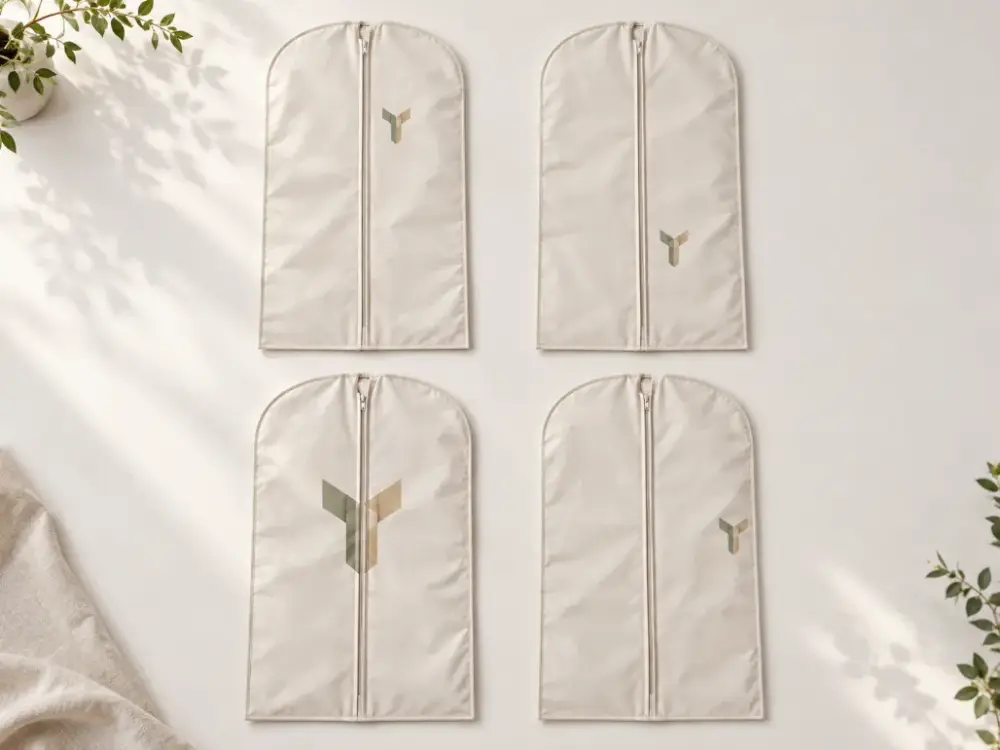
Garment bags are unusual among branded packaging formats because they spend most of their visible life hanging vertically, often partially obscured by other garments on a rail. That vertical orientation and partial visibility should drive placement decisions more than any flat-layout preference.
Key placement zones
Most garment bags offer four practical logo zones:
- Upper-centre front panel — the area visible above the shoulder line when the bag hangs among others. This is the highest-visibility zone in both retail and home wardrobe settings.
- Lower-centre front panel — visible when the bag hangs alone or when a customer holds it flat. Partially hidden on crowded rails.
- Full-front panel — a large logo or pattern that spans most of the front surface. Maximum brand impact when visible, but more sensitive to fold lines and hanger stress.
- Gusset or side panel — occasionally used for a secondary logo, tagline or care instruction. Visibility depends on bag width and how tightly garments are packed.
Visibility trade-offs by placement
| Placement zone | Rail visibility | Flat / delivery visibility | Fold-line risk | Artwork area |
|---|---|---|---|---|
| Upper-centre | High | High | Low | Limited |
| Lower-centre | Low on crowded rails | High | Moderate | Moderate |
| Full-front | Depends on rail density | Very high | High | Large |
| Side / gusset | Low | Low | Low | Narrow |
The upper-centre zone is the safest default for a primary logo on garment bags with logo branding because it stays visible in the widest range of real-world hanging scenarios. Full-front designs are effective for high-end presentation but must be evaluated for fold-line and hanger-stress durability before committing to a branding method.
Alignment with closure and hanger opening
Most garment bags have a hanger opening at the top — either a hole or a hook slot. Logo artwork must be positioned so the opening does not cut through or crowd the logo. If a zipper runs down the centre front, a centred logo may be interrupted by the zipper teeth and pull tab. These construction details must be confirmed on a pattern layout before artwork is finalised.
—
Material, Construction and Hanging, Folding and Handling Considerations
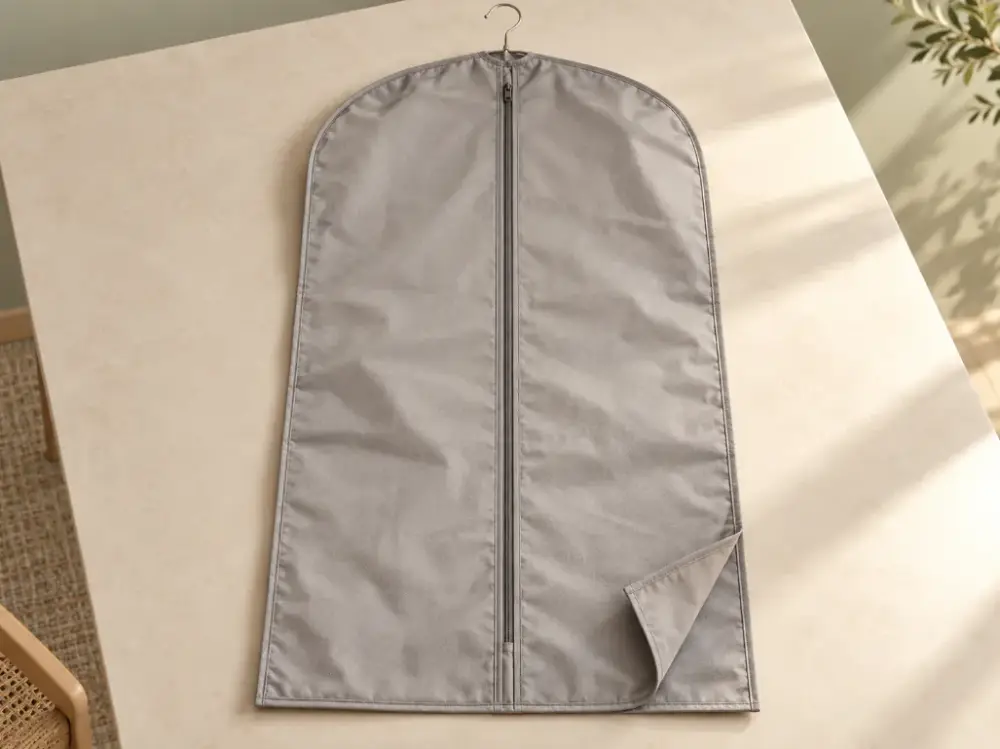
The fabric you select for a custom garment bag affects not just the feel and weight of the packaging but also how the logo may behave through handling. Garment bags can hang on hooks or hangers, be folded for shipping, or be handled in warehouses and travel contexts. The relevant conditions should be defined from the actual channel rather than assumed from the bag category.
Common garment bag materials and logo compatibility
- Non-woven polypropylene (NWPP) — lightweight, low-cost, commonly used for suit covers and event giveaways. Accepts screen printing and heat transfer well. Surface texture is relatively uniform, which supports clean logo edges. However, NWPP is less durable under repeated folding and may show permanent crease marks through the logo area.
- Polyester and PEVA — moisture-resistant and stable over a wide temperature range. Polyester accepts heat transfer and sublimation printing. PEVA is smooth and wipeable but limits branding to surface-applied methods. Both hold up better under hanging stress than NWPP.
- Cotton and cotton-canvas — natural feel, breathable, and suited to screen printing, DTF transfer, embroidery and hot stamping. Heavier cotton reduces hanger distortion but adds shipping weight. Cotton is a strong choice when the garment bag is intended for long-term reuse and the logo must remain legible through handling and washing.
- Nylon — lightweight, strong, often used for travel garment bags. Accepts sublimation and heat transfer. Logo durability is generally good, but nylon’s smooth surface can cause heat-transfer logos to peel at fold lines if adhesion is insufficient.
For a deeper comparison of cotton, linen and other natural fabrics in packaging contexts, see Cotton vs Linen vs Muslin Pouches: Complete Fabric Comparison Guide.
Hanging-wear: where logos fail
The term “hanging-wear” describes the gradual deterioration of fabric and print in areas that bear the weight of the garment inside the bag or that sit against the hanger hook. The most vulnerable zones are:
- Shoulder area — where the hanger pushes outward against the fabric. On lightweight materials, this stretch can distort a logo printed across the shoulder zone.
- Fold lines — if the garment bag is folded for shipping, the fold crease may run directly through the logo. Printed or foiled logos can crack along this line. The risk increases with stiffer or thicker print films.
- Zipper edges — if the logo is positioned near a zipper, repeated opening and closing can cause abrasion at the logo edge.
Buyers should identify how the bag will be stored and shipped before fixing the logo position. If the bag is always shipped folded, the fold line should be marked on the artwork layout so the logo can be adjusted to avoid it — or the branding method should be confirmed to tolerate folding.
—
Which Logo Method Fits Large Artwork and Fine Details?
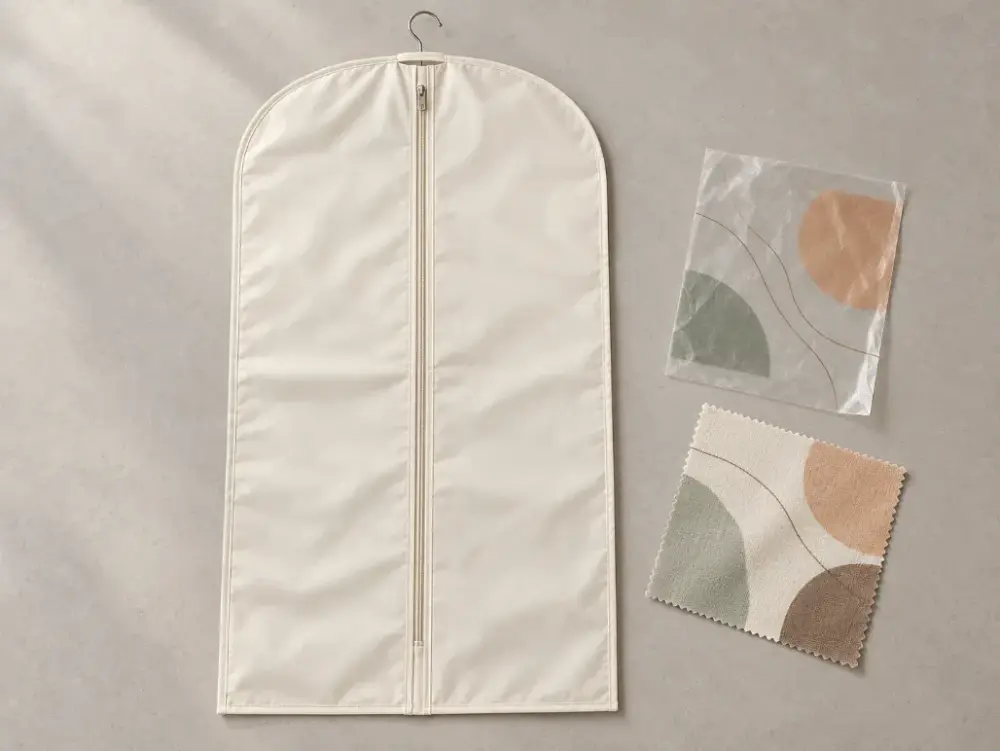
Garment bags with logo branding often require either large-area coverage (an all-over pattern or a full-panel logo) or fine-detail legibility (a tagline, web address or small monogram). Few branding methods handle both extremes equally well. The table below outlines general trade-offs; specific limits depend on the fabric and must be confirmed during sampling.
Branding method comparison for garment bags
| Method | Large-area suitability | Fine-detail suitability | Fold-line durability | Typical substrate |
|---|---|---|---|---|
| Screen printing | Good for solid fills; multi-colour adds cost per screen | Moderate; minimum line weight depends on mesh count | Moderate; ink may crack on stiff prints | Cotton, NWPP, polyester |
| Heat transfer (vinyl or film) | Good for single-colour large logos; full-colour via digital transfer | Good for digital transfers; limited for thin vinyl cuts | Lower on fold lines; film may peel | Polyester, nylon, cotton |
| DTF (direct-to-film) | Very good; handles gradients and photographic detail | Good; resolution depends on print head and film quality | Moderate; confirm adhesion on specific fabric | Cotton, polyester, blends |
| Sublimation | Excellent for all-over prints; no added surface layer | Good; resolution limited by fabric weave openness | Excellent; dye is embedded in fibre | Polyester and poly-coated fabrics only |
| Embroidery | Impractical for large fills; suited to smaller logos | Limited below a certain stitch width; fine text may blur | Very good; thread does not crack | Cotton, canvas, nylon |
| Hot stamping / foil | Moderate; large foil areas may show uneven adhesion | Good for clean type and line art | Lower; foil may crack at fold lines | Cotton, velvet, NWPP |
These comparisons are planning directions, not universal acceptance results. The selected fabric, artwork coverage, print settings, folding pattern and intended use determine what is feasible. Before production, both parties should agree the project-specific sample, handling conditions, test or inspection method, sample quantity and acceptance criteria.
For a detailed cost and setup-fee comparison across these methods, see The Complete Logo Method Cost Comparison.
Large-area logos: specific risks
When a logo covers a substantial share of a garment bag’s front panel—for example, roughly 30–40% as an early artwork-review trigger—several risks may increase:
- Ink or film thickness — large screen-printed fills deposit more ink, which can stiffen the fabric in the printed zone. This stiffness makes fold-line cracking more likely.
- Colour evenness — large solid fills in a single colour reveal any unevenness in ink lay-down or heat distribution. Mottling or streaking that would be invisible in a small logo becomes obvious on a large panel.
- Registration — if the large logo includes multiple colours or a pattern that must align with bag edges or seams, registration tolerance matters. Slight fabric stretch during printing or sewing can shift the pattern.
Fine-detail logos: legibility limits
Small text, thin strokes and detailed monograms have a minimum reproducible size that varies by method:
- Screen printing: minimum line weight depends on the mesh count used. Very fine serif text or lines below a certain stroke width may fill in or break up.
- Heat transfer and DTF: digital resolution is generally higher, so finer details reproduce more cleanly. However, the transfer adhesion step can soften edges slightly.
- Embroidery: stitch density sets the floor. Individual stitches have physical width, so letters below a certain height lose definition. Serif fonts and thin strokes are particularly difficult.
- Hot stamping: thin lines reproduce well on smooth substrates but may be lost on textured fabrics like canvas or linen.
The exact minimum line weight and text height for each method and fabric combination should be confirmed on a pre-production sample. Requesting a sample with both a large-fill area and a fine-detail element on the same bag is the most direct way to evaluate both limits at once.
—
Colour Contrast, Minimum Line Weight and Artwork Preparation
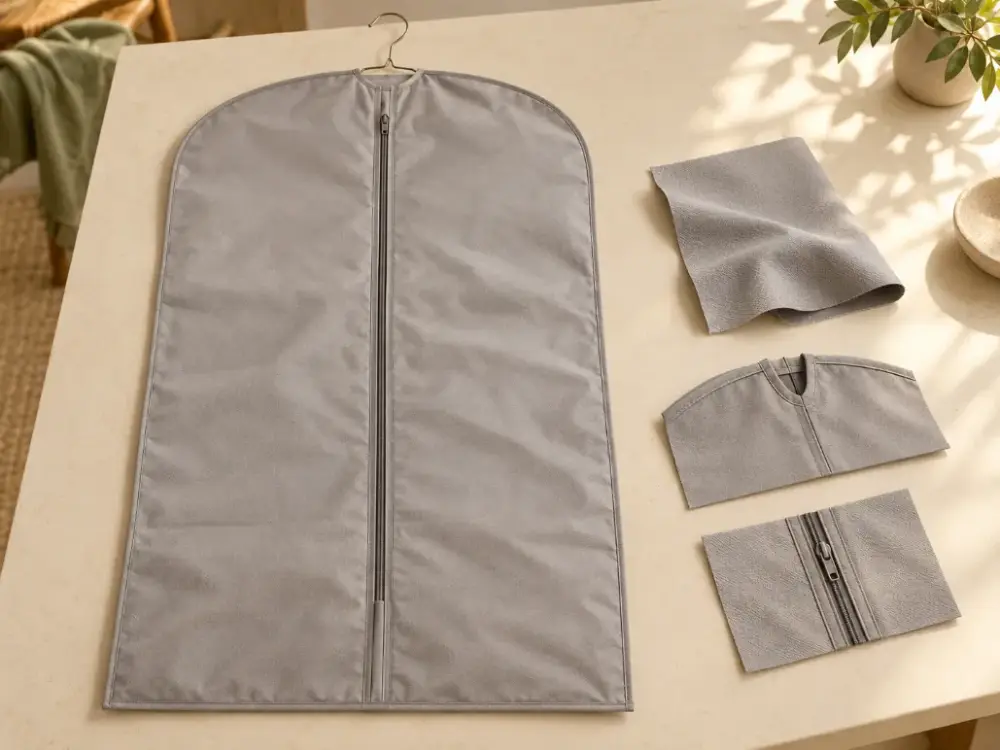
Colour contrast on fabric
Colour accuracy on fabric is harder to control than on paper or rigid packaging. Fabric absorbs ink differently depending on fibre type, weave density and surface treatment. A dark logo on a light fabric generally produces better contrast and sharper edges than a light logo on a dark fabric, where ink opacity and coverage uniformity become more challenging.
Key colour variables to define early:
- Fabric base colour — confirm whether the fabric is dyed or raw. Dyed fabric batches can shift slightly between production runs, affecting perceived logo colour.
- Logo colour specification — provide a Pantone reference (on coated or uncoated stock, as appropriate) rather than an RGB or CMYK value. Fabric-printing operators use Pantone references as the starting point for ink matching, though an exact match on every fabric type is not guaranteed. See Pantone Color Matching for Custom Pouches for a detailed guide on colour specification.
- Contrast ratio — if the logo includes both heavy fills and fine text, the fine text needs more contrast against the fabric to remain legible. A logo that works in a single dark colour on white fabric may need a different colour plan on a navy or black bag.
Minimum line weight and font size
“Line weight” refers to the thickness of any stroke, outline or thin element in the artwork. “Minimum font size” refers to the smallest text height that reproduces legibly with a given method.
General guidelines (confirm specific limits at sampling):
- Screen printing: lines thinner than approximately 0.5 mm may not hold consistently; font heights below roughly 5–6 mm may lose clarity on textured fabrics.
- Heat transfer / DTF: finer lines are possible due to digital resolution, but very thin isolated lines may not survive repeated use.
- Embroidery: the minimum readable letter height is typically higher than for print methods; script and serif fonts are harder to reproduce cleanly at small sizes.
- Hot stamping: thin lines reproduce well on smooth surfaces, but a minimum stroke width still applies.
These are general indicators, not fixed rules. Treat them as an early artwork-screening aid. The actual limits, evaluation conditions and acceptance criteria should be defined jointly for the chosen fabric, ink system, machine settings and intended handling.
Artwork file preparation
Providing print-ready artwork reduces revision cycles and colour mismatches. A complete artwork submission for garment bags with logo branding should include:
- Vector file (AI, EPS or PDF with outlined fonts) for all logos and text. Raster files (JPEG, PNG) are acceptable for photographic elements only, and should be supplied at a minimum resolution appropriate to the print method.
- Pantone colour references for every colour in the logo.
- Artwork placement drawing showing the logo position relative to the bag’s hanger opening, zipper, seams and edges, with measurements from at least two reference points.
- Fold-line indication — if the bag will be shipped folded, the intended fold position should be marked on the layout so the factory can flag any overlap with the logo.
- Minimum-size callout — if the logo includes fine text or thin strokes, note the smallest element and ask the factory to confirm reproducibility with the proposed method and fabric.
—
Sampling and Quality Control for Garment Bags With Logo
The sample checks below are a practical starting framework, not a pre-set testing protocol. Before sampling, the buyer and supplier should agree the relevant hanging load, fold pattern, number of cycles or duration, viewing conditions, inspection quantity and pass/fail criteria for the actual bag, artwork and channel.
Why garment bag samples need more than a flat check
Most fabric packaging samples are reviewed flat on a table. Garment bag samples should also be reviewed hanging — on the intended hanger type, at the intended hanging duration, and after at least one fold-unfold cycle that simulates shipping. This is because:
- A logo that looks crisp flat may show distortion at the shoulder once the bag carries a garment’s weight on a hanger.
- A foil or transfer logo that passes a flat inspection may crack along the fold line after one packing-unpacking cycle.
- Colour appearance shifts between flat and hanging views due to lighting angle and fabric drape.
Pre-production sample checklist
Before approving production, request and evaluate a sample against the following:
- Logo position accuracy — measure the actual position against the approved artwork placement drawing. Check clearance from hanger opening, zipper and seams.
- Logo colour match — compare under daylight (D65) and the lighting conditions in which the bag will typically be seen (retail, wardrobe, etc.). Note any visible difference from the Pantone reference.
- Fine-detail legibility — read the smallest text and check the thinnest lines. If any element is illegible or broken, discuss a minimum-size adjustment.
- Large-fill evenness — examine any large solid area for mottling, streaking, edge bleed or ink build-up.
- Fold-line test — fold the sample along the shipping fold line, press flat, then unfold and inspect the logo for cracking, peeling or colour change.
- Hanger test — hang the sample with a representative garment inside for a reasonable period. Check for shoulder distortion, logo stretching and fabric puckering near the print area.
- Fabric hand and weight — confirm the fabric feels, drapes and weighs as expected. A heavier-than-specified fabric may improve logo durability but change shipping cost. A lighter fabric may save cost but increase fold-line cracking risk.
- Closure function — if the bag has a zipper, Velcro, snap or drawstring closure, operate it several times and check whether the closure interferes with or abrades the logo.
- Seam and edge finish — examine internal seams, edge binding and any reinforcement at the hanger opening. These construction details affect the bag’s longevity and therefore the logo’s useful life.
In-production quality control
Once production begins, define inspection criteria for the logo specifically:
- Colour tolerance — specify an acceptable range from the approved sample (e.g., a visual match under D65 daylight, or a defined ΔE range if instrumental measurement is available).
- Position tolerance — specify the maximum allowable shift from the approved placement.
- Defect classification — define which logo defects are critical (wrong colour, missing elements, illegible text), major (position shift beyond tolerance, visible cracking after fold test) and minor (slight edge variation within tolerance).
- Fold-test sampling — where folding is relevant, include a fold-unfold check alongside flat visual inspection. The sampling rate, fold pattern and acceptance condition should be agreed for the project rather than treated as a default.
For a broader quality-control framework applicable to fabric packaging, see A Practical Quality-Control Checklist for Custom Jewelry Pouches. While written for jewelry pouches, the inspection structure and defect-classification logic apply directly to garment bags.
—
What Should Buyers Confirm Before Approving Production?
The questions below are not theoretical — each one addresses a specification variable that can change cost, timeline or outcome if left undefined. Resolve these before signing off on a production order.
Specification confirmation checklist
- Garment bag dimensions and format — confirm the bag size, gusset depth, hanger-opening style and closure type based on the actual garments the bag will hold. These must be specified, not assumed.
- Material and weight — confirm the fabric type, weight (GSM) and colour. Request a swatch of the production-run fabric, not just the sample fabric, if there is any batch-change risk.
- Logo branding method — confirm which method the factory will use and that it is compatible with the specified fabric. If your logo has both large fills and fine details, confirm that the chosen method handles both on a single sample.
- Artwork files delivered — confirm that the factory has received vector artwork, Pantone references, a placement drawing and a fold-line overlay.
- Minimum line weight and text size confirmed — confirm that the smallest artwork element reproduces legibly on the sample.
- Colour match approved — confirm the approved sample’s logo colour under a defined lighting condition.
- Fold-line logo review — agree the fold pattern and acceptance criteria, then assess the sample for cracking, peeling or colour change along the shipping fold line.
- Hanger-test review — agree the representative garment, duration and acceptable appearance, then assess the sample for logo distortion or fabric puckering.
- QC criteria defined — confirm that colour tolerance, position tolerance and defect classifications are documented and agreed with the factory.
- Packing method — confirm how finished bags will be folded, stacked or rolled for carton packing, and verify that the packing method does not create new fold lines through the logo area.
—
Next Step
Define your garment bag dimensions, fabric preference, logo artwork and placement zone before requesting a quote. Prepare a vector logo file with Pantone references and a placement drawing that marks the hanger opening, fold line and closure position. Contact YJXPACK with these details to discuss available branding methods, sampling and production options for your garment bags with logo.
—
Frequently Asked Questions
Can I put a full-size logo across the entire front of a garment bag?
Yes, but full-panel logos face higher risk of fold-line cracking, colour mottling and registration shift. Sublimation on polyester handles large-area coverage well because the dye is embedded in the fibre rather than sitting on the surface. For cotton or NWPP, screen printing or DTF can cover large areas, but the sample should be folded and inspected before approval.
How do I prevent logo cracking on garment bags that are shipped folded?
Three approaches help: choose a branding method that embeds colour into the fabric (sublimation, well-cured screen ink on cotton) rather than applying a surface film; position the logo away from the fold line; or change the packing method to rolling rather than folding if the carton dimensions allow it. The most reliable check is a fold test on the actual sample.
What file format should I send for garment bag logo artwork?
Provide a vector file (AI, EPS or outlined-font PDF) for logos and text. Include Pantone references for each colour. If the design includes photographic or gradient elements, supply a high-resolution raster file alongside the vector. Always include a dimensioned placement drawing showing logo position relative to the hanger opening, zipper and bag edges.
Is embroidery practical for garment bag logos?
Embroidery may suit small-to-medium logos on cotton, canvas or nylon garment bags. It adds a stitched surface rather than a film layer, but the result should still be assessed for the chosen fabric, stitch density and handling conditions. It is generally less efficient for large-fill areas and has a higher minimum text size than print methods. Thread colour options and any Pantone match should be confirmed on a stitch-out sample.
How does fabric texture affect logo sharpness?
Rougher, more textured fabrics (canvas, linen, heavy non-woven) may soften logo edges compared with smoother surfaces. The exact result depends on fabric, ink or transfer system, artwork and settings. If your logo includes fine detail, assess it on the exact production fabric—not a smoother sample swatch—using the agreed sample-review criteria.
Share This Story, Choose Your Platform!